Introduction
Thank you! for buying one of our template, if you find any kind of issue or bug don't hesitate on contact us.
We will resolve your problem as soon as possible.
Template information:
- Name: Jenifer
- Tagline: Personal and Professional Ghost Blog Theme
- Author: the9t9
- Platform: Ghost
- Demo: Jenifer
- Created: 20 April 2021
- Last Update: 20 April 2021 See Changelog
- Version: 1.0.0
General Features
- 100% responsive design for all devices
- W3 validation code
- 2 Google fonts
- Very light-weight theme
- Fast loading
- SVG icons
- Easily customizable
- Well written documentation
- Supported with image and without images
- Translation Ready
Ghost inbuilt features
- Ghost supported v4.0.0
- Publication and Description
- Publication cover
- Publication logo and icon
- Social accounts
- Koenig Editor
- Primary Navigation
- Secondary Navigation
- General posts and pages
- Tags
- Authors
- Responsive Content
- Gallery
- Bookmark
- HTML code
- Code Highlighter
- Share posts on social media
- Post Navigation
- Load more options
- Translation ready to other language
- Subscription features
- Membership
- Signin
- Signup
- Notifications
Pages
- Homepage
- Post page
- Tag page
- Author page
- Error
- Page
- Error-404
Custom Pages
- Custom Author list
- Custom Tag list
- Custom Contact
- Custom Account
- Custom Membership
- Custom Signin
- Custom Signup
Additional Ghost Features
- Disqus comment box
- Custom Contact promo
- About section
- Beautiful footer
- Documentation load more button
- Tag list sidebars
- Copy url with click
- Formspree for contact form
- Medium zoom
- Mobile menu support
- SVG logo
- Syntax highlighting
- Custom buttons
- Dark Light Mode
Requirements
Jenifer is a Ghost theme so the basic requirements are the same of Ghost
Theme Setup
Install the template
This guide assumes that you already have a Ghost installation ready.
Uploading the theme (v1.0 for Ghost 1.2.x and higher)
- Log in into your Ghost admin panel.
- Go to settings (design section) and upload "jenifer.zip"
- Click Activate.
Uploading the theme on custom hosting (FTP)
The instructions are pretty simple:
- Login on your FTP account.
- Unzip the jenifer.zip file and copy Jenifer folder to your /ghost_installation/content/themes
- Restart your installation if neccesary. You can ask help to your hosting provider if you don't know how to do this step.
- Login into your ghost admin panel.
- Go to settings (general) and select theme "Jenifer"
- Click Save.
Basic theme usage
How to change the logo
Jenifer supports text and image logo. By default text logo is used, if you want a image logo you can do the next steps:
- Go to Settings/General
- Go to Blog Logo and click upload image.
- Click Save.
![]()
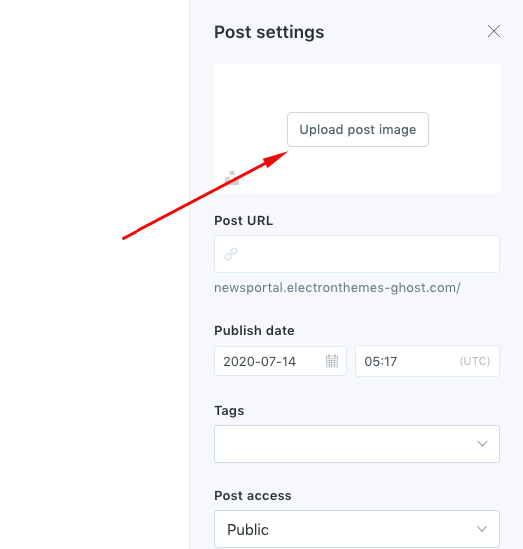
Setting a post featured image
We recommend to set a post image this will set the image just above the post title, like the next image:
To add the featured image for every post you must follow the next steps:
- Click the cog icon (on left side of update/save button).
- You will see a new sidebar has opened.
- Click on Add post image and upload your thumbnail like the screenshot.
- Click update/ save.
How to create an static page.
- Go to New Page.
- Set a title and content.
- Go to post settings (cog icon next to save button).
Creating the navigation menu.
Note: This feature is available on ghost 0.5.9 and higher.
- Login into your admin.
- Go to "Settings" -> "Navigation".
- You can create some links like: home, contact or gallery if you are actually using them.
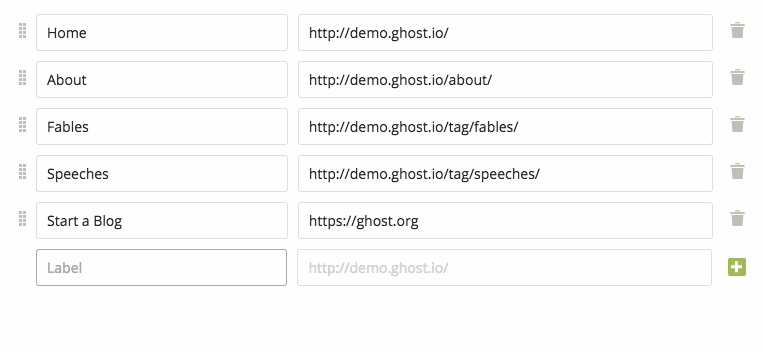
Primary Menu

Secondary menu

How to create a gallery
Jenifer is compatible with the latest gallery feature from Koenig Editor.
First you must click "plus" button and select gallery:
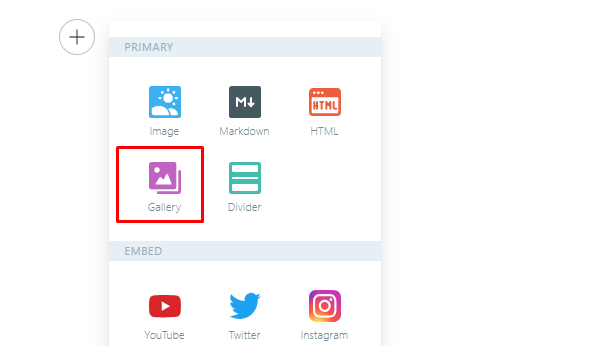
After you select some images you will see a custom grid like this:
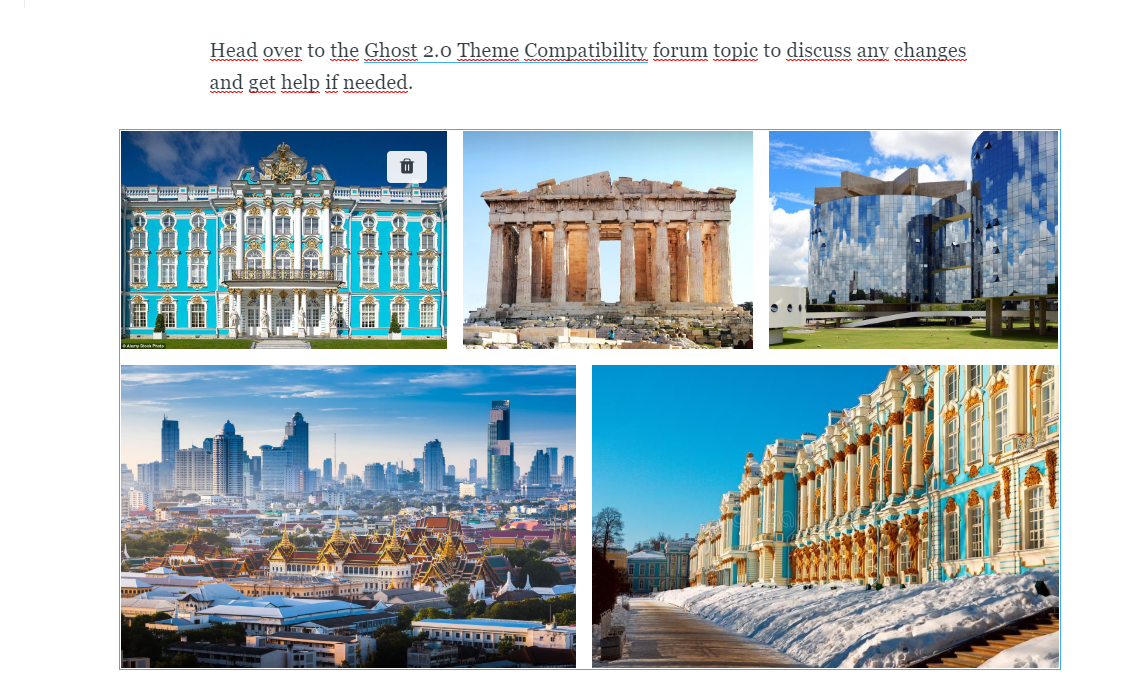
Finally click save and you will see you custom gallery on the post content, it is important to know every image can be clicked and displayed on a custom lightbox, so you must upload good quality images.
Dark and Light Mode
Easyart Support Dark and Light mode both. Your visitor can read easily on both mode. Dark Switcher is here
If you want to use only mode, you can easily do that.
- Go to
default.hbsand line number 2 - use data-theme="dark" as like as following html code
<body class="{{body_class}} bg-white-smoke" lang="{{@site.lang}}">
For dark background you need to change the body class, dark:bg-dark-wrap and normal:bg-white-smoke
Plugins configuration
How to get the Disqus Shortname
Disqus comments works like any JS api. You can create your Disqus code in the next url: http://disqus.com/admin/create/
If you don't have a Disqus account just create it (it's free) then open the url: http://disqus.com/admin/create/
Now you can see something like this:
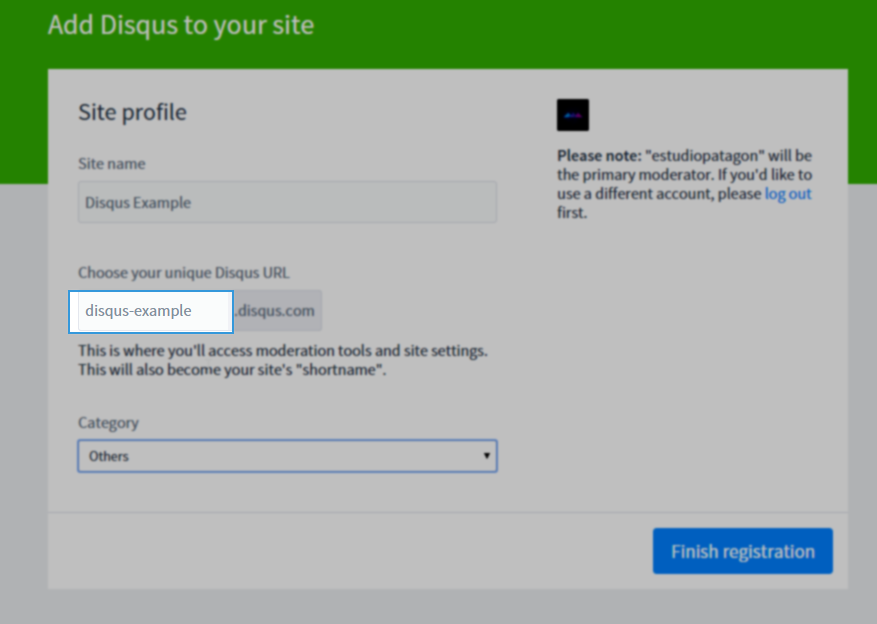
Your unique "Disqus URL" is your shortname copy that name and click finish registration.
In this case will be disqus-example. Now we have our disqus shortname and we must change our template to view these changes..
- Go to the directory where is your template.
- Go to /content/themes/Jenifer/partials/disqus and open the next file: disqus-comment.hbs and git to line number 10 for disqus_shortname = "Jenifer-ghost-themes";
- Change with your shortname, in this case 'disqus-example';
- Save the file and upload to your ghost installation.
- Optional, you can verify if all is correct clicking Verify on disqus steps (where we get our shortname).
Tags
To create tag, go to Dashboard > Tags > New Tag

Footer
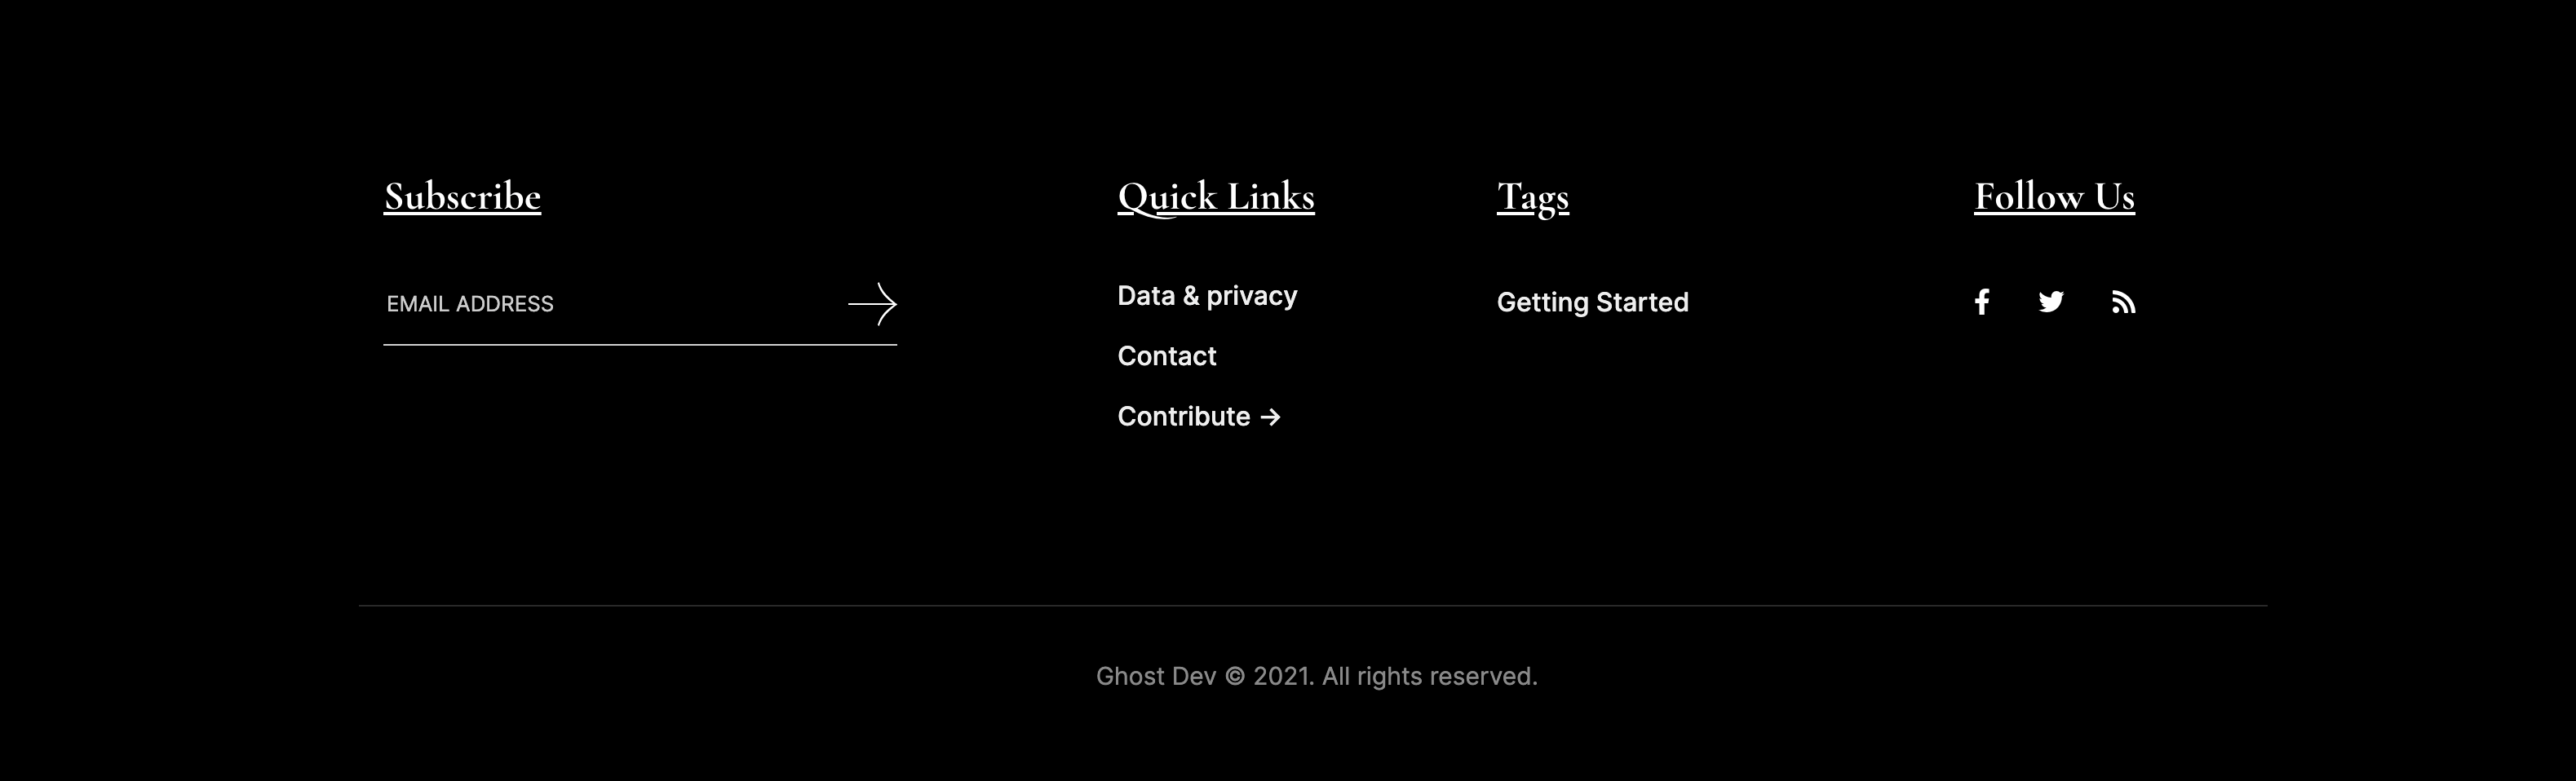
1. About text
- Go to Jenifer/partials/footer/about-widget.hbs
2. Quick Links
These are coming from Secondary menu. To change this go to Dashboard/Design/Secondary Menu
3. Tags
These are coming from Tags. if you used tags then tag list appeared here.
4. Subscribe
These are coming from Member Subscription. if enable member portal then it's appeared here.
Contact
Contact page
To change contact page information, go to partials/contact-info.hbs
Formspree
We used formspree for the form. You can change with your email address. To change to to partials/contact-form.hbs and line number 8
<form class="row" action="https://formspree.io/electronthemes@gmail.com" method="POST"></form>
Membership and Subscriptions
Membership and Subscription feature comes from Ghost
V3.0.0. It is an awesome feature for paid
publications. You can eaily manage your membership
and subscription from Dashboard > Labs
Enable Membership
Enable your membership from
Dashboard > Labs > Members

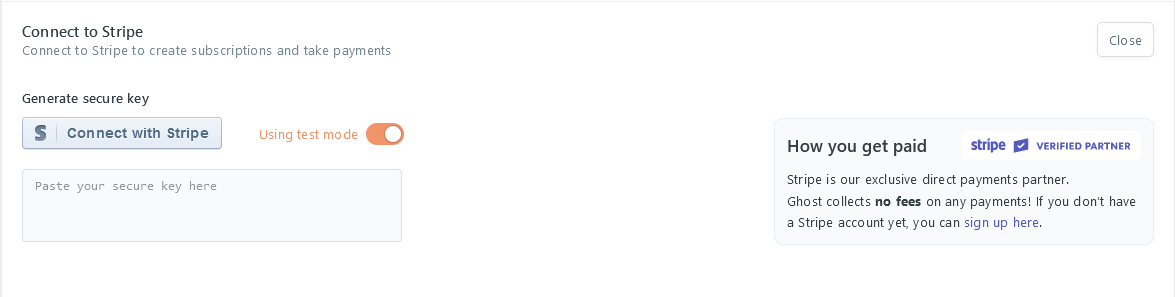
Connect to Stripe
Connect your stripe account api key and publishable key to get payment from members. You will your api key from here
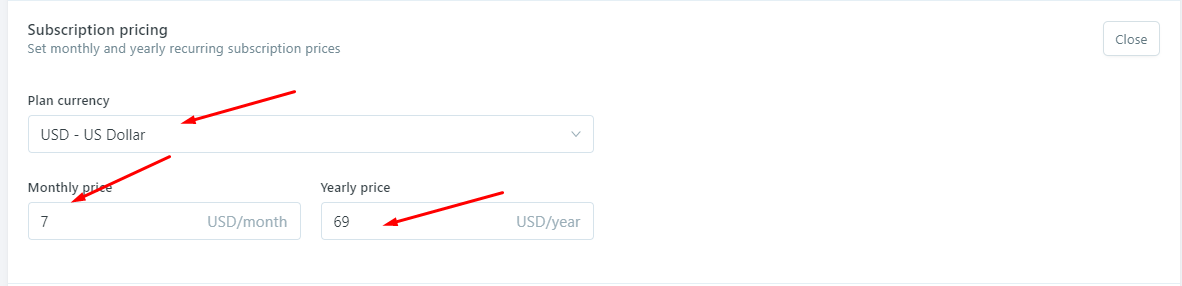
Subscription pricing
Add your price for monthly and yearly from here
Customize your pricing table
To customize your pricing tables, go to
Jenifer > partials > members >
                                pricing-tables
. You can find 2 pricing table here:
-
Free pricing table:
plan-free.hbsFrom line 15 to 17 -
Monthly pricing table:
plan-monthly.hbsFrom line 14 to 18 -
Yearly pricing table
plan-yearly.hbs: From line 14 to 20
For signup card, go to custom-membership.hbs
Edit the information inside {{t "..."}}
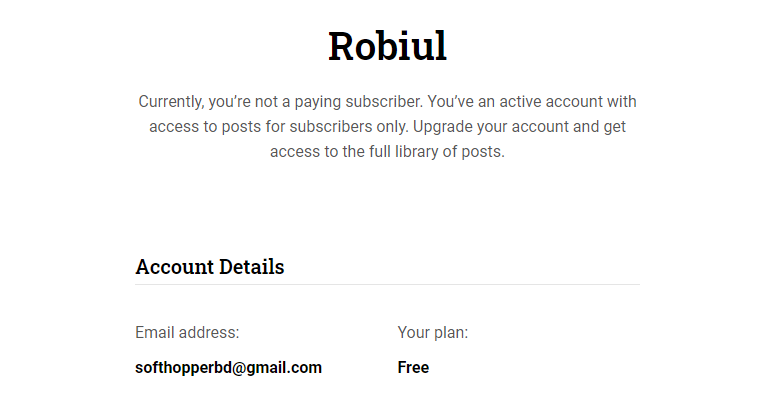
Subscriber information
To edit subscriber information, go to
Jenifer > partials > members >
                                subscriber-information.hbs
Show Subscription Portal
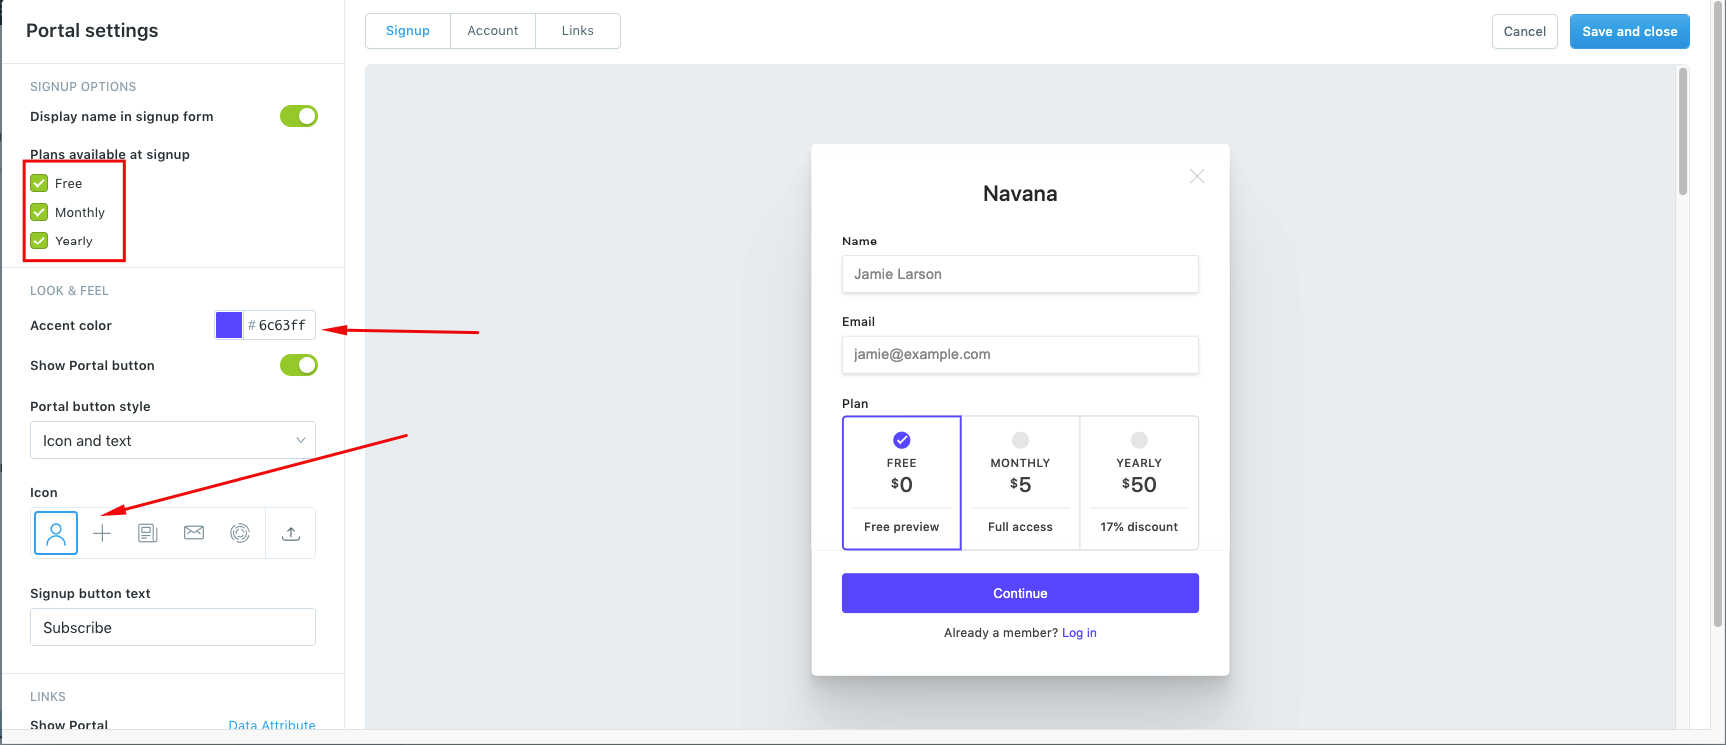
From ghost 3.37.0, Ghost added subscription portal system where accounts, signup, signin, pricing are showing. You can easily show portals from Labs > Enable Members > Portal settings. It will show a portal at bottom of your site like this
To Customize the portals
1. Go to Labs > Enable members > Portal settings

Custom Page and Post Template
Page template is a default settings on Ghost. We have created some custom page and post template for the theme. The page template are as follows:
Page Template
- Membership
- Account
- Signin
- Signup
- Authors
- Contact
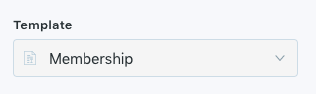
Selecting page template
- Create a new page
- Click on Settings to the right side and scroll down
- Select page template i.e. "Membership"
Page URL
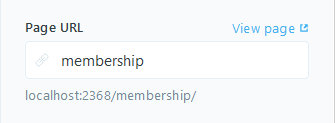
When you create page, please keep page slug like this.
| Page title | Page URl |
|---|---|
| Membership | /membership/ |
| Account | /account/ |
| Signin | /signin/ |
| Signup | /signup/ |
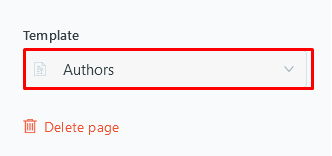
Author List page
- Create a new page
- Click on gear icon from right side and sroll down
- Select Template Authors
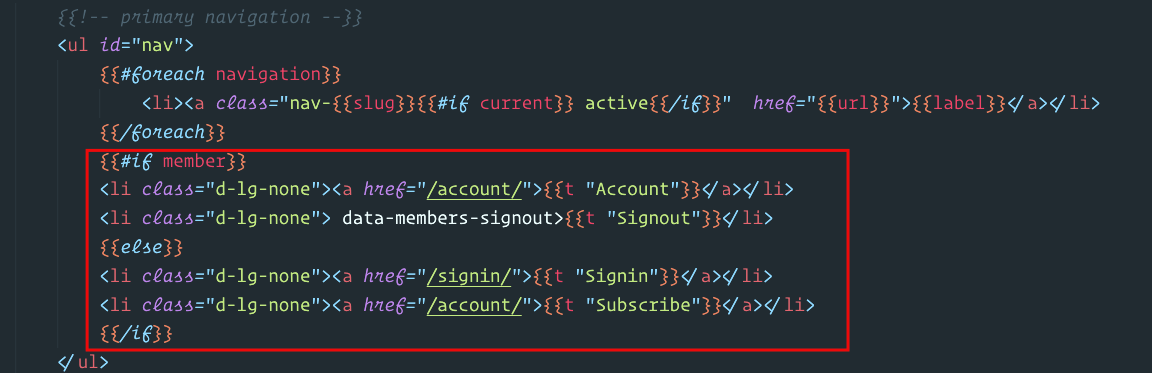
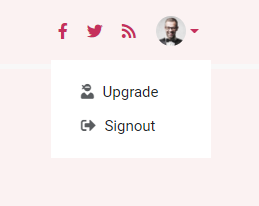
Change header top menu for signin, subscribe and dropdown account details
If you want to change or remove the menumbership navigation, change the code from
Jenifer > partials > navigation.hbs
file.
Navigation Dropdown card
To change navigation dropdown card, go to {{> members/header-members-details}}
Advanced Setup (code knowledge needed)
How translate the theme
Jenifer supports multiples languages but you need to add your own lang file for this purpose:
- Go to Settings/General -> Publication Language
- Click "expand" and change to your correct lang code, for example: French is "fr", Spanish is "es".
- Click Save.
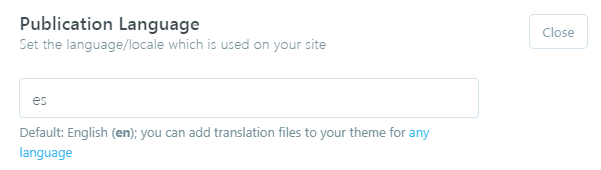
After that, you need to add an extra files inside Jenifer/locales/fr.json
We recommend to copy en.json file and start translating every text inside this file.
Enable search engine (API Key)
On Ghost v2.12 and later moved the old Beta API to the new Content API, this require some steps if you want to get it work the search engine.
- Login into your Ghost admin.
- Go to integrations.
- Click on "add custom integration" button.
- Add a name like "Search Engine".
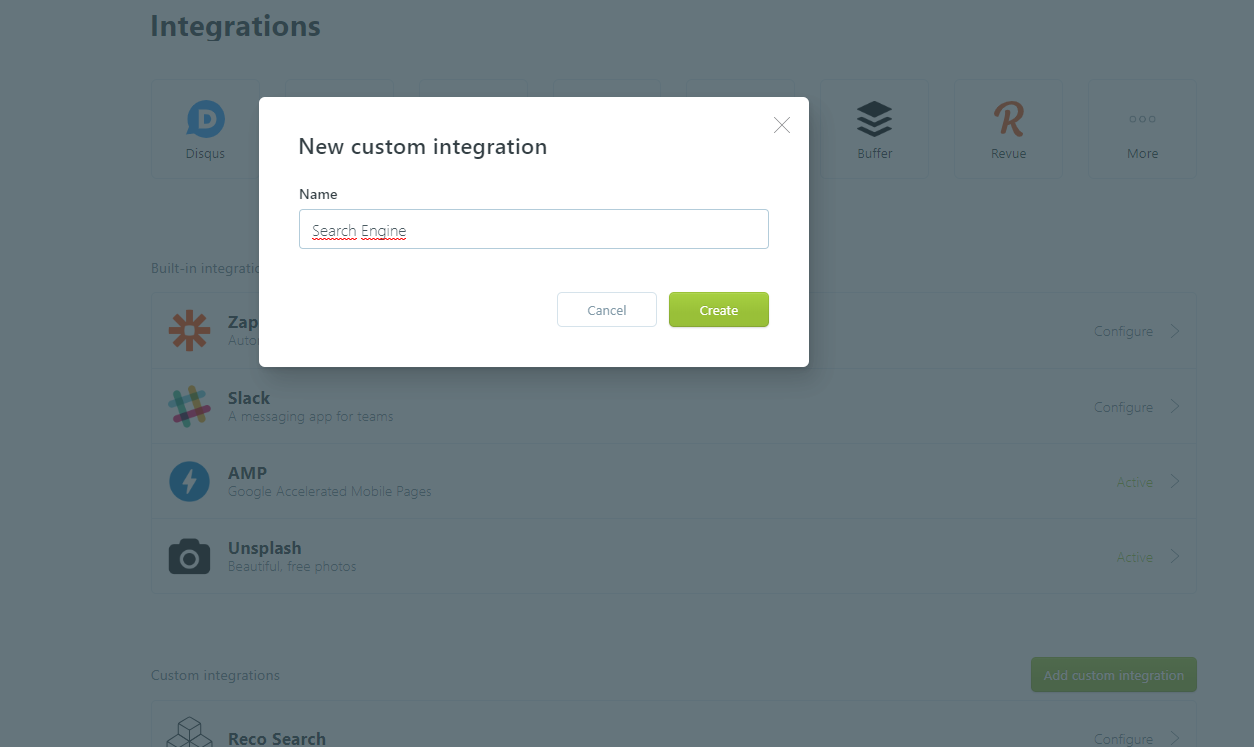
- Click create.
- Copy the Content API Key.
- Go to Code Injection > Site Header and add your content API like below:
<script>
    var contentApiKey = "e62572ad9f5d100bb42964b1e";
</script>
How to change template main color
Jenifer is working on color, Go at color-three.css where all color are located.
If you want to change the main color you must follow the next steps:
8.- Zip Jenifer Folder and reupload into your Ghost Installation.
Javascript Files
Plugins and libraries
Development mode
- jQuery - jQuery http://jquery.com
- FitVids.js https://github.com/davatron5000/FitVids.js
- Fuse Search https://github.com/krisk/Fuse
- Prism js for Code highlighter https://prismjs.com/
- jQuery Lightbox https://github.com/francoischalifour/medium-zoom
- Lazy loading disqus https://samclarke.com/lazy-loading-disqus
IMPORTANT: All external js file is used in js file: plugins.js
Optimization
This section will explain the basics concepts of optimization to get the highest score on Google Page Speed test.
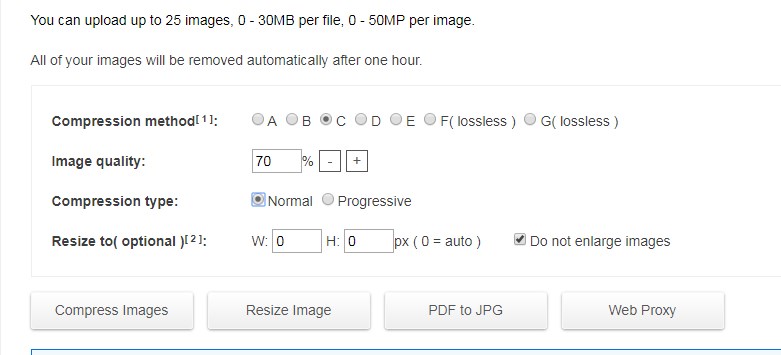
Image Optimization
There is a lot of recommeded tools for this purpose, if you don't want to loss image quality, just skip this section.
Highest compression tool: Toolur
Website: http://compressimage.toolur.com/
We tested several compression tools and toolur online, is one of the best if you want to get 0 errors on Google Insight.
Recommended options:
- Compression method: C
- Image Quality: 70%
- Don't resize and don't enlarge images.
TinyPNG: good quality and weight balance
TinyPNG is one of the most used compressor in the web, has a very basic interface and you will lost almost 10 - 15% quality. Its is highly recommended if you want to optimize your images without loosing quality.
Website: https://tinypng.com/
FileOptimizer: desktop APP
This application has the a good balance pretty closer like TinyPNG but as a desktop app.
Website: https://sourceforge.net/projects/nikkhokkho/files/FileOptimizer/
The only one important thing, is to enable "allow lossy optimizations":

JS Minify: https://javascript-minifier.com/
The steps are pretty similar to CSS, you just need to copy your code into assets/dist/scripts.min.js at line nº 100 and it is highly recommended to minify your code.
If you are familiarized with Javascript (developer)
and you need to add extra jQuery functions, we
recommend you to download
Prepos 6
and load the prepos-6.config file into Prepos APP,
this will help you to compile js/functions.js and
minify all your code automatically.
Fonts used
- PT Sans - https://fonts.google.com/specimen/PT+Sans
- PT Serif - https://fonts.google.com/specimen/PT+Serif
- Secular One - https://fonts.google.com/specimen/Secular+One
Changelog
We are showing all of our change log here. You can find our regular updates based on version.
------------  VERSION - 1.0.0: Release on 20 April 2021  ------------
[+] Initial Release
Support
If you have any questions, please use our profile contact form on Envato http://themeforest.net/user/the9t9/